
To continue the discussion of construction toys for the use of concept design I wanted to talk about Geneblock Soldiers. I had seen these a while back, but I did not think they looked worth $50+ each to experiment with. After some time I ran across a few sets second hand on ebay. The first set I got was still on sprues and I did an assembly video review of that figure below. The others came preassembled. Sadly one was missing a piece, but I was able to use one of the extra bits from the unassembled kit to compensate. The way they works reminds me a little of the original Construct bots system. At least in the sense of the ball joints. The thing that makes these better in a way, is there is only one connector type, and each piece usually has a multitude of ways to combine them.
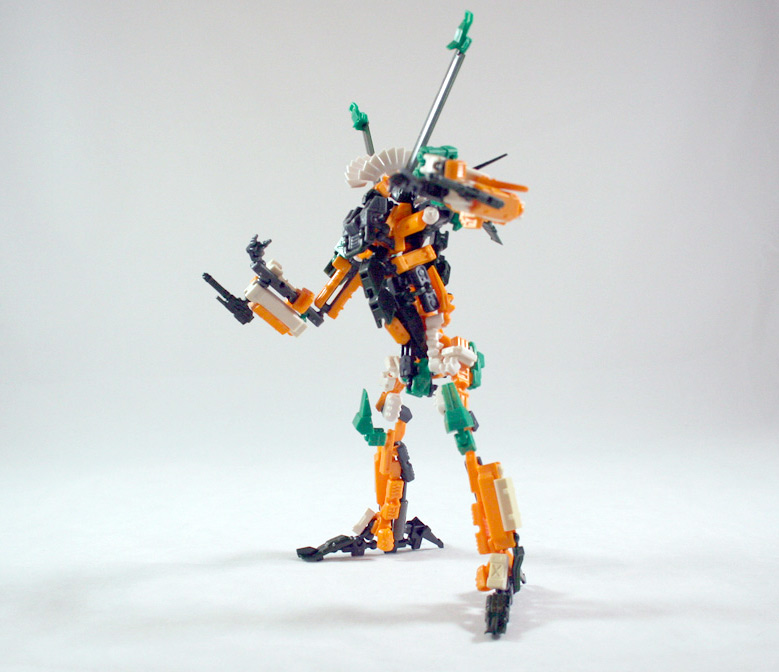
The first kit I tried out was a bright orange and green, and it made a cool robot with a huge gun. From what I gather, you can buy a set of these, and they are like trading figures where you might get two figures from a series. I noticed that figures can be in different colors, so I assume this adds to the blind box system. I have not found much info on these in english or bought a set new, so I am just guessing here. At first glance it looks like a simple model kit. The plastic is a bit heavier duty, and I assume that is so it can endure being taken apart many times. The first time assembling was a little difficult and reminded me of the hassle of building with assemble borg. When I built a larger item with the prebuilt kits I did find it easier to assemble.

Having just one kit can make for a lot of fun. It is a good learning exercise in moving parts for poses when designing your own bot. Instead of the trick of incorrectly drawing something to gain poses, you can design your mech more realistically and create parts that function in the real world. The design themselves are neat and fun to play with.

I also picked up a transforming kit called Hover Blade. This one had more realistic military color scheme. Its robot design was pretty decent as it shared components with the design we just looked at. I like the look of this one more, and I think even with its parts it has more possible configurations.

This is a perfect example of what I am trying to express with these toys. The above robot turns into a helicopter with a simple transformation. There is very little components here that are identifiable as a helicopter. The shape of it though makes us think helicopter. A sketch of that silhouette would also identify as a helicopter. The purpose I am proposing with these and other toys are to be able to produce unique silhouettes that you can sketch from and inspire new creations. Even in their robot form, they are somewhat abstract and use imagination, yet they are no so simplified that one has to try so hard to find the form in them.

Due to the size I wonder if these next two are part of the same set. They share parts of the same color, and are much smaller than the other kits I have shown. Their parts are still compatible with the other kits, but the bots they make are a bit different. The Fier Bear, and Beat Spike figures are made up of much smaller pieces to form the components. The others rely on parts that serve a function, then have elements added to their frame to make them more unique.


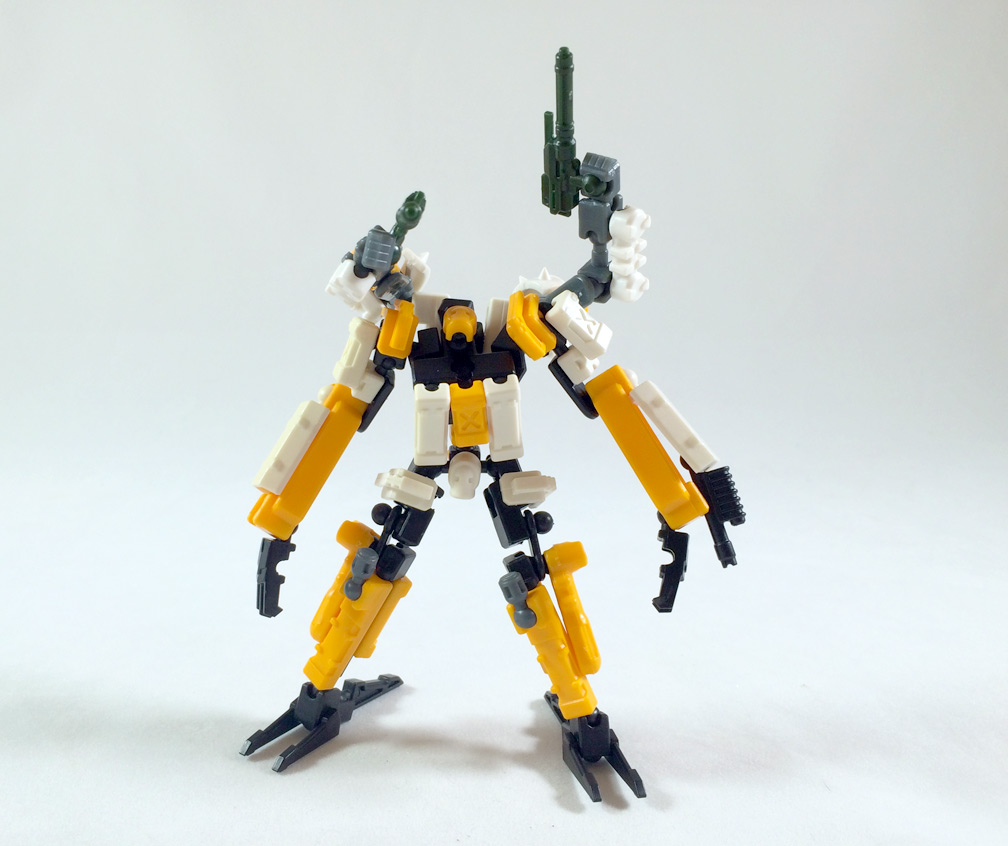
On to the creations. I wanted to start with something simple, and change up the design with the parts included with a single figure. With the spare parts included and the versatility of the parts you can change it up a bit. I used the alternate head, and other parts to make a rocket launcher and giant claw. I was also easily able to change the leg configuration into a chicken walker style.

I wanted to make another design using the parts included between these bots. The shoulder canisters made me immediately think extra limbs. With some simple part swapping with get a new kind of bot.
Like many of the other builds I do, I wanted to use all the parts I could and make something much bigger. While, I did not use every part I had, I use quite a few. I bet with whats left over, I could make another smaller bot as well. This figure is about 3 times the size of the standard figure. I was able to use some of the similar methods I used on construct bots, but it was easier due to the part design. You don't have to use as many support pieces since these are much lighter.

Bulking up the designs is a little tricker, so you will still end up with a slender bot unless you have a lot of parts, or build shorter bots to compensate.


Check out the vBuild as well where I put together the first set I talk about and give a short impression of the kit.
After messing with a few of these, and getting to build with them I think they are a pretty decent building toy. Their large assortment of parts, as well as the versatility of ways you can connect them, I think they are a good tool. I do think $30 each is too much for what they are, but if you can come across them cheaper, and feel this system is inspiring to you, its work picking up a few to layout some forms to give inspirations to concept design. Stay tuned for more building toy reviews, and be sure to subscribe to our youtube, as well as follow us on facebook and twitter. Until next time, keep creating.


